How to Deactivate All WordPress Plugins
If you are seeing some errors like blank page or any fatal error after installing some wordpress plugins and you are not sure which plugins are getting errors then you can easily disable all wordpress plugins, Or you just install wordpress on your server and you are not able to login in your wordpress admin panel then you must try to disable wordpress all plugins once, because some time few plugins may create some issues during installation.
Deactivating All WordPress Plugins is quite easy You can follow 2 methods to deactivate all active plugins.
Method-1: Deactivate all plugins using phpMyAdmin
Step-1: Login to your Cpanel and access phpMyAdmin.
Step-2: This will launch phpMyAdmin in a new browser window. Now you need to select your WordPress database.
Step-3: By default all table prefix will be wp_ but it my be differ if you choose to diffent prefix during installation.
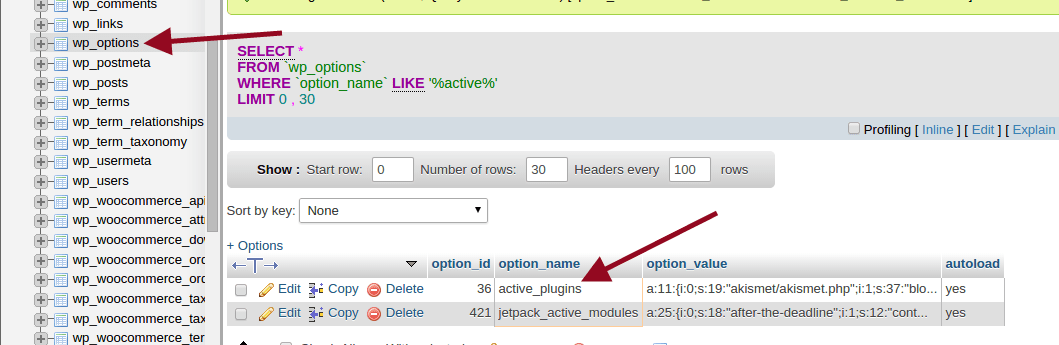
Step-4: You need to click on the wp_options table. Inside wp_options table you will see rows of different options. You will need to find the option active_plugins and then click on the Edit Link next to it.
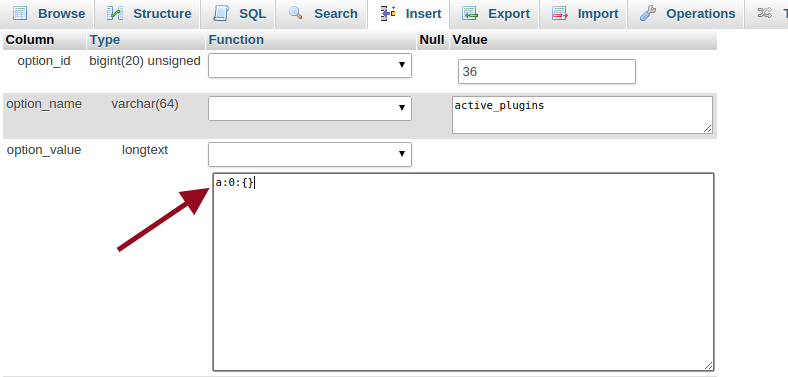
Step-5: Now Edit window you need to change the option_value field to a:0:{} and then click on Go button to update your changes.
Method-2: Deactivate all plugins using FTP / File Manager
This method is quite easy you only need to follow only 2 steps to deactivate all wordpress plugins.
Step-1: First you need to connect to your website using FTP client, or File Manager in cPanel. Once connected, you need to navigate to the /wp-content/ folder.
Step-2: Inside the wp-content folder, rename the Plugins folder with any name like where all plugins installed on your website like plugins-deactivate.
Cheers..!! you have been successfully deactivated all wordpress plugins.